
Canvas 和 SVG
两者虽然都能画图,但机制完全不同:
- Canvas: 即时模式 (Immediate Mode)。像个画板,画完就变成像素,无法修改,想改只能擦掉重画。
- SVG: 保留模式 (Retained Mode)。像堆积木,每个图形都是一个 DOM 元素,可以随时通过 JS 修改属性来改变形状。
1. Canvas
Canvas 只是一个标签,所有绘制工作都在 JS 中完成。
1.1 绘制矩形 (Rectangles)
Canvas 中唯一能直接绘制的形状。
ctx.fillRect(x, y, w, h): 填充矩形。ctx.strokeRect(x, y, w, h): 描边矩形。ctx.clearRect(x, y, w, h): 清除矩形区域 (橡皮擦)。
html
<!-- 1. 创建画布 -->
<canvas id="myCanvas" width="200" height="100"></canvas>

<script>
    // 2. 获取画布元素
    const canvas = document.getElementById("myCanvas");
    // 3. 获取绘图上下文 (这是你的画笔)
    const ctx = canvas.getContext("2d");

    // 4. 开始绘画
    //填充绘画
    ctx.fillStyle = "red";      // 蘸红墨水
    ctx.fillRect(10, 10, 50, 50); // 画一个实心矩形 (x, y, w, h)

    //描边绘画
    ctx.strokeStyle='green'
    ctx.strokeRect(100, 10, 50, 50); // 画一个空心矩形 (x, y, w, h)
</script>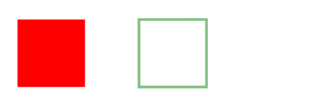
1.2 绘制路径 (Paths)
画圆、线、不规则图形的核心。
ctx.beginPath(): 开始新路径 (必须调用,否则新样式会覆盖旧线条)。ctx.moveTo(x, y): 抬起画笔,移动到某点。ctx.lineTo(x, y): 画直线到某点。ctx.arc(x, y, r, startAngle, endAngle, counterclockwise): 画圆/弧。- 注意:角度用弧度制。360度 =
2 * Math.PI。
- 注意:角度用弧度制。360度 =
ctx.closePath(): 自动闭合路径 (连接起点和终点)。ctx.stroke(): 真正开始描边。ctx.fill(): 真正开始填充。
html
<canvas id="myCanvas" width="200" height="200"></canvas>

<script>
    // 2. 获取画布元素
    const canvas = document.getElementById("myCanvas");
    // 3. 获取绘图上下文 (这是你的画笔)
    const ctx = canvas.getContext("2d");

    // 4. 开始绘画
    ctx.strokeStyle = 'red'
    ctx.lineWidth = 5
    ctx.lineCap='round'
    ctx.beginPath()
    ctx.moveTo(0, 0)
    ctx.lineTo(50, 0)
    ctx.lineTo(100, 100)
    ctx.closePath()
    ctx.stroke()
</script>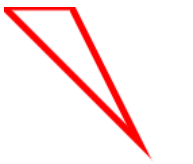
1.3 样式与颜色 (Styles)
ctx.fillStyle = 'red': 填充色。ctx.strokeStyle = '#00f': 线条色。ctx.lineWidth = 5: 线宽。ctx.lineCap: 线头样式 (butt,round,square)。
1.4 图像操作 (Images)
ctx.drawImage(img, x, y): 原图绘制。ctx.drawImage(img, x, y, w, h): 缩放绘制。ctx.drawImage(img, sx, sy, sw, sh, dx, dy, dw, dh): 裁剪绘制 (从原图切一块画到画布上)。
html
<canvas id="myCanvas" width="200" height="200"></canvas>

<script>
    // 2. 获取画布元素
    const canvas = document.getElementById("myCanvas");
    // 3. 获取绘图上下文 (这是你的画笔)
    const ctx = canvas.getContext("2d");

    // 4. 开始绘画
    const img = new Image();
    img.src = '../../docs/public/backgroundImage.png';
    img.onload = () => {
    ctx.drawImage(img, 0, 0); // 确保图片好了再画
    ctx.strokeStyle='red'
    ctx.strokeRect(50, 10, 50, 50);
};
</script>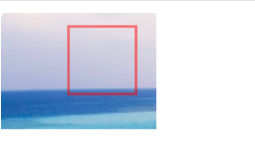
1.5 状态保存 (State)
ctx.save(): 保存当前的样式(颜色、线宽、坐标系)。ctx.restore(): 恢复上一次保存的样式。- 场景:你想旋转画布画一个歪的矩形,画完后想恢复正的坐标系继续画别的。
2. SVG
SVG 直接写在 HTML 里,像写 div 一样简单。
2.1 基础图形
<rect>: 矩形。<rect x="10" y="10" width="100" height="50" fill="red" rx="10" />(rx 是圆角)。
<circle>: 圆。<circle cx="50" cy="50" r="40" stroke="black" stroke-width="2" />
<line>: 线段。<line x1="0" y1="0" x2="100" y2="100" stroke="red" />
<text>: 文本。<text x="10" y="20">Hello</text>
html
<svg width="200" height="100">
  <!-- 画一个矩形 -->
  <rect x="10" y="10" width="50" height="50" fill="red" />

  <!-- 画一个圆 -->
  <circle cx="100" cy="35" r="25" fill="blue" stroke="black" />

  <!-- 画一条线 -->
  <line x1="150" y1="10" x2="190" y2="60" stroke="green" stroke-width="5" />
</svg>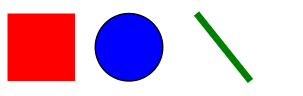
2.2 万能路径 (<path>)
这是 SVG 最强大的标签。通过 d 属性的一串指令来绘画。
| 指令 | 含义 | 参数示例 |
|---|---|---|
| M | Move To (移动) | M 10 10 (笔落到 10,10) |
| L | Line To (直线) | L 50 50 (画线到 50,50) |
| H | Horizontal (水平线) | H 90 (水平画到 x=90) |
| V | Vertical (垂直线) | V 10 (垂直画到 y=10) |
| A | Arc (弧线) | 复杂参数 (半径, 旋转, 大弧标志, 终点) |
| Q | Quadratic (二次贝塞尔) | 控制点, 终点 |
| C | Cubic (三次贝塞尔) | 控制点1, 控制点2, 终点 |
| Z | Close (闭合) | 自动连回起点 |
注:大写字母表示绝对坐标,小写字母表示相对坐标(相对于上一点)。
js
<path d="M 10 10 L 50 50 H 90 V 10 Z" fill="none" stroke="black" />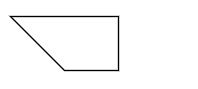
2.3 样式 (CSS)
SVG 可以像 HTML 一样加 class,用 CSS 控制颜色。
html
<!DOCTYPE html>
<html lang="en">
<head>
    <meta charset="UTF-8">
    <title>Title</title>
    <style>
        .my-icon {
            fill: blue; /* SVG 用 fill 而不是 background */
            stroke: red; /* SVG 用 stroke 而不是 border */
            transition: fill 0.3s;
        }

        .my-icon:hover {
            fill: green;
        }
    </style>
</head>
<body>
    <svg width="200" height="100">
        <!-- 画一个矩形 -->
        <rect x="10" y="10" width="50" height="50" fill="red" class="my-icon"/>
    </svg>
</body>
</html>
3. 常见问题 (FAQ) 与 避坑指南
3.1 Canvas 绘制图片有时是空白的?
原因: 图片还没加载完,你就调用了 drawImage。
解法: 必须在 onload 回调里画。
js
const img = new Image();
img.src = 'photo.jpg';
img.onload = () => {
  ctx.drawImage(img, 0, 0); // 确保图片好了再画
};
3.2 如何解决 Canvas 在高清屏 (Retina) 模糊的问题?
核心原理: 1个 CSS 像素在 Retina 屏上对应 2个或 3个物理像素。如果 Canvas 的 width 属性是 100,它只有 100 个物理像素,被拉伸显示就会糊。
标准解法:
js
function setupCanvas(canvas) {
  const dpr = window.devicePixelRatio || 1;
  const rect = canvas.getBoundingClientRect();

  // 1. 设置画布物理尺寸为 CSS 尺寸的 dpr 倍
  canvas.width = rect.width * dpr;
  canvas.height = rect.height * dpr;

  // 2. 强制 CSS 尺寸保持原样
  canvas.style.width = `${rect.width}px`;
  canvas.style.height = `${rect.height}px`;

  // 3. 缩放绘图上下文,让你不用修改绘图代码里的坐标
  const ctx = canvas.getContext('2d');
  ctx.scale(dpr, dpr);
  return ctx;
}
3.3 SVG 图片引入后无法用 CSS 修改颜色?
场景: <img src="icon.svg" class="icon">,CSS 写 .icon { fill: red } 无效。
原因: <img> 标签引入的 SVG 是作为一个独立文档存在的,外部 CSS 无法穿透进去。
解法:
- 内联 SVG (推荐): 直接把
<svg>...</svg>代码粘贴到 HTML 里。 - SVG Sprite (雪碧图): 使用
<use xlink:href="#symbol-id">。
3.4 Canvas 如何实现“点击图形”交互?
Canvas 本身只是一张图片,没有 DOM 节点。
方案:
- 数学计算法: 记录所有图形的坐标。点击时,遍历所有图形,计算鼠标点是否在图形范围内(如点到圆心距离 < 半径)。
- 拾取颜色法 (Color Picking):
- 在内存里创建一个看不见的 Canvas。
- 给每个图形分配一个唯一的颜色(如
#000001,#000002)。 - 在隐藏 Canvas 上画一遍。
- 获取鼠标位置的像素颜色
getImageData,根据颜色 ID 找到对应的图形对象。
3.5 SVG viewBox 是什么?
这是 SVG 最难理解也是最重要的属性。 <svg width="100" height="100" viewBox="0 0 50 50">
width/height: 视口 (Viewport)。墙上挂画框的大小(100x100)。viewBox: 截取区域。摄像机的镜头。这里表示“只看 SVG 世界中 (0,0) 到 (50,50) 的区域”。- 效果: 你把 50x50 的内容强行放大显示在 100x100 的框里,所以放大了 2 倍。